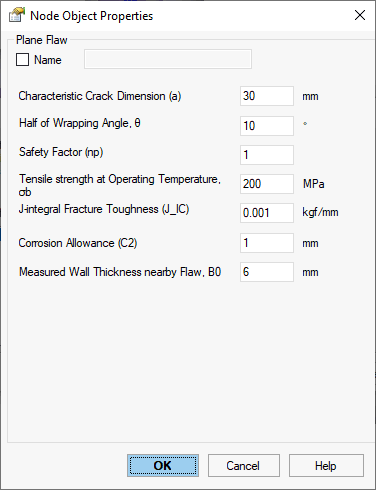


The Plane Flaw element analyzes crack stresses according to the GB/T 19624-2019 standard (China). Add it to any pipe node, and review results in the Flaw Stress Table.

Property |
Description |
Name |
Unique element identifier. When checked, the flaw is visible in the 3D model view. |
Characteristic Crack Dimension, a |
Crack depth dimension 'a' as illustrated below.
|
Half of Wrapping Angle |
Angular extent of the flaw. Valid range: 18 to 180 degrees. |
Safety Factor |
Design safety factor applied to the flaw assessment. |
Tensile strength at operating temperature |
Specified tensile strength for the pipe material at operating conditions. |
J-integral Fracture Toughness |
Material fracture toughness value (J-integral). |
Corrosion Allowance |
Additional wall thickness to account for future corrosion. |
Measured Wall Thickness nearby Flaw |
Actual wall thickness 'B' measured adjacent to the flaw location. |
The analysis must satisfy the following condition:

To insert a plane flaw, select the target node and navigate to: Insert > Flaw > Plane Flaw